Bringing new shrimp home is exciting, but the acclimation process is critical for their survival. Shrimp are far more sensitive to water parameter changes than fish, and improper acclimation is one of the leading causes of losses in the hobby.
In this guide, we’ll cover everything you need to know about the drip acclimation method - the gold standard for safely introducing shrimp to their new home.
Why Proper Acclimation Matters
Shrimp are invertebrates that cannot regulate their internal chemistry like fish can. When water parameters change suddenly, shrimp experience osmotic stress that can lead to:
- Failed molts
- Lethargy and loss of color
- Bacterial infections
- Immediate death
The key parameters that affect shrimp include:
- TDS (Total Dissolved Solids) - Affects osmotic balance
- GH (General Hardness) - Essential for shell formation
- KH (Carbonate Hardness) - Affects pH stability
- pH - Critical for biological processes
- Temperature - Affects metabolism and oxygen levels
What You’ll Need
Before starting the acclimation process, gather these supplies:
- Clean bucket or container (never used with soap or chemicals)
- Airline tubing (about 2-3 feet)
- Airline valve or a loose knot in the tubing
- Small net
- TDS meter (highly recommended)
- Timer
The Drip Acclimation Method
Step 1: Temperature Equalization
Float the sealed bag in your aquarium for 15-20 minutes. This allows the water temperature inside the bag to gradually match your tank temperature.
Pro tip: Keep the lights off during this process to reduce stress on the shrimp.
Step 2: Transfer to Container
Open the bag and pour the shrimp with their water into your clean container. Make sure the container is stable and the water level is at least 2-3 inches deep.
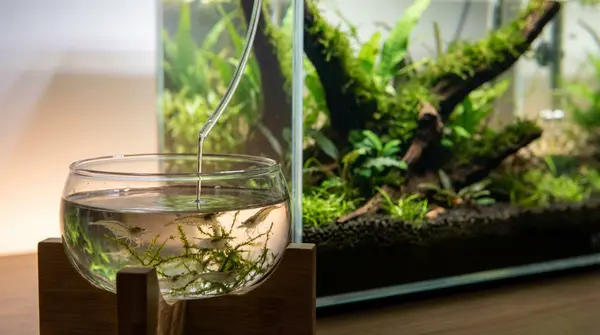
Step 3: Start the Drip
Set up your airline tubing as a siphon from your tank to the container:
- Submerge one end of the tubing in your tank
- Start a siphon (you can suck on the other end or use a syringe)
- Adjust the valve or knot to achieve 2-4 drops per second
- Secure the tubing so it stays in place
Step 4: Monitor and Wait
Let the drip continue for 1-2 hours. The water volume in the container should roughly double or triple during this time.
During this period:
- Check periodically that the drip is still flowing
- Watch the shrimp for signs of stress (erratic swimming, trying to escape)
- Keep the container covered to prevent jumping
Step 5: Test Parameters
Before transferring the shrimp, use your TDS meter to compare:
- Shipping water TDS (measure what’s left in the bag)
- Container water TDS (should be close to your tank)
- Tank water TDS
If the container TDS is within 10-20 ppm of your tank, you’re ready to proceed.
Step 6: Transfer the Shrimp
Using your net, gently catch each shrimp and release them into your tank. Never pour the container water into your tank - this water may contain:
- Ammonia from shrimp waste
- Parasites or diseases
- Bacteria from the shipping process
Common Acclimation Mistakes
Mistake 1: Rushing the Process
Some hobbyists try to acclimate in 30 minutes or less. This is almost never enough time for shrimp to adjust safely. Commit to at least 1 hour, preferably 2.
Mistake 2: Dripping Too Fast
A fast drip rate defeats the purpose of gradual acclimation. If you’re dripping more than 4-5 drops per second, slow it down.
Mistake 3: Ignoring Temperature
If you skip the floating step, you’re introducing temperature shock on top of water chemistry changes. Always equalize temperature first.
Mistake 4: Adding Shipping Water to Tank
This is a recipe for introducing diseases or parasites to your established colony. Always net transfer only.
Mistake 5: Acclimating Sick Shrimp
If shrimp arrive dead or clearly sick (white or milky bodies, lack of movement), do not add them to your tank. Contact the seller about their arrival guarantee.
What to Expect After Acclimation
Even with perfect acclimation, new shrimp may:
- Hide for the first 24-48 hours
- Show reduced coloration initially
- Molt within the first few days (a good sign!)
- Take a few weeks to show their full colors
Don’t panic if your shrimp seem shy at first. This is normal behavior as they adjust to their new environment.
When to Feed New Shrimp
Wait at least 24 hours before offering food to newly acclimated shrimp. This gives them time to:
- Reduce stress levels
- Explore their new environment
- Find natural biofilm and algae
When you do feed, offer smaller amounts than usual for the first week.
Tips for Success
Here are some additional tips to improve your acclimation success rate:
-
Test your water before ordering - Know your parameters so you can communicate with sellers and choose shrimp raised in similar conditions
-
Request parameter information - Many quality breeders will share their water parameters, helping you prepare
-
Consider seasonal timing - Extreme temperatures during shipping (very hot or cold months) increase stress and mortality
-
Have your tank established - Never acclimate shrimp to a new, uncycled tank. Your tank should be fully cycled with stable parameters for at least 4-6 weeks
-
Quarantine when possible - If you have multiple tanks, quarantine new arrivals for 2-4 weeks to prevent disease spread
Conclusion
Proper acclimation is an investment of time that pays off in healthy, thriving shrimp. While the drip method takes patience, it dramatically increases survival rates and gives your new shrimp the best start in their new home.
Remember: shrimp keeping is a marathon, not a sprint. Take your time with acclimation, and your shrimp will reward you with vibrant colors and active behavior for months to come.
Frequently Asked Questions
The recommended acclimation time is 1-2 hours using the drip method. This allows the shrimp to gradually adjust to your tank's water parameters without shock. Never rush this process - patience is key to successful acclimation.
Floating the bag only equalizes temperature, not water chemistry. Shrimp are very sensitive to changes in TDS, pH, GH, and KH. The drip method is essential for gradually introducing your tank water and preventing osmotic shock.
Aim for 2-4 drops per second. This rate allows water chemistry to change gradually over 1-2 hours. Too fast and you risk shocking the shrimp; too slow and the process takes unnecessarily long.
No, never add shipping water to your tank. It may contain ammonia from shrimp waste, parasites, or diseases. Use a net to transfer only the shrimp to your tank after acclimation is complete.
Deaths after acclimation are usually caused by: 1) Rushing the process (less than 1 hour), 2) Large parameter differences between shipping and tank water, 3) Ammonia buildup in shipping water, or 4) Pre-existing health issues from shipping stress.
Yes, always acclimate even when adding shrimp of the same species from a different source. Different breeders maintain different water parameters, and even slight differences can cause stress or death if not acclimated properly.
Track Your Parameters Like a Pro
Stop guessing if your water is right. ShrimpKeeper tracks TDS, GH, KH, pH, and temperature with species-specific recommendations.
Download FreeRelated Articles

Complete Beginner's Guide to Cherry Shrimp Care
Discover why cherry shrimp are the perfect starter species for beginners. This comprehensive guide covers everything from tank setup to breeding, making shrimp keeping simple and successful.
How to Acclimate Shrimp: Drip Method vs Float Method
Proper acclimation is crucial for shrimp survival. Learn when to use the drip method versus float method and follow our step-by-step guide for stress-free introductions.
How to Make Your Own Shrimp Food at Home: Complete DIY Guide
Discover how to create cost-effective, nutritious homemade shrimp food that promotes better growth and breeding. Get proven recipes and step-by-step instructions.