You’ve just received a shipment of beautiful new shrimp, and they’re sitting in their shipping container looking a bit stressed from their journey. What happens next could mean the difference between thriving shrimp that live for years or losing your entire investment within hours. Proper acclimation isn’t just recommended—it’s absolutely critical for shrimp survival.
Unlike hardy fish that can tolerate sudden water changes, freshwater shrimp are extremely sensitive to shifts in temperature, pH, TDS (total dissolved solids), and mineral content. Their delicate exoskeletons and complex molting process make them particularly vulnerable to osmotic shock, which occurs when water parameters change too quickly.
In this comprehensive guide, we’ll compare the two main acclimation methods—drip acclimation and the float method—and show you exactly when and how to use each technique to give your new shrimp the best possible start in their new home.
Why Proper Acclimation Matters for Shrimp
Shrimp acclimation is all about preventing osmotic shock, which happens when there’s a sudden change in the dissolved minerals and salts in water. Unlike fish, shrimp can’t quickly regulate their internal water balance, making them extremely vulnerable to rapid parameter changes.
The shipping process already stresses shrimp through temperature fluctuations, limited oxygen, and waste buildup. Adding the shock of drastically different water parameters can overwhelm their systems, leading to:
- Immediate death from osmotic shock
- Failed molts within days or weeks
- Increased susceptibility to bacterial infections
- Long-term health issues and shortened lifespan
- Breeding problems in surviving shrimp
The most critical parameters to match gradually are:
- Temperature: Even 2-3°F differences can stress shrimp
- pH: Rapid pH changes are particularly dangerous for Caridina species
- TDS: Total dissolved solids affect osmotic pressure directly
- GH (General Hardness): Essential for proper molting and shell development
- KH (Carbonate Hardness): Affects pH stability
Drip Method: The Gold Standard for Shrimp
The drip method is universally recommended by experienced shrimp keepers because it gradually adjusts all water parameters over several hours. This slow process allows shrimp to adapt without shock.
When to Use the Drip Method
- Always for Caridina species (Crystal Red, Crystal Black, Bee shrimp, etc.)
- When there are significant parameter differences between shipping and tank water
- For expensive or rare shrimp where you can’t afford losses
- For beginners as the safest option
- When introducing shrimp to established tanks with stable parameters
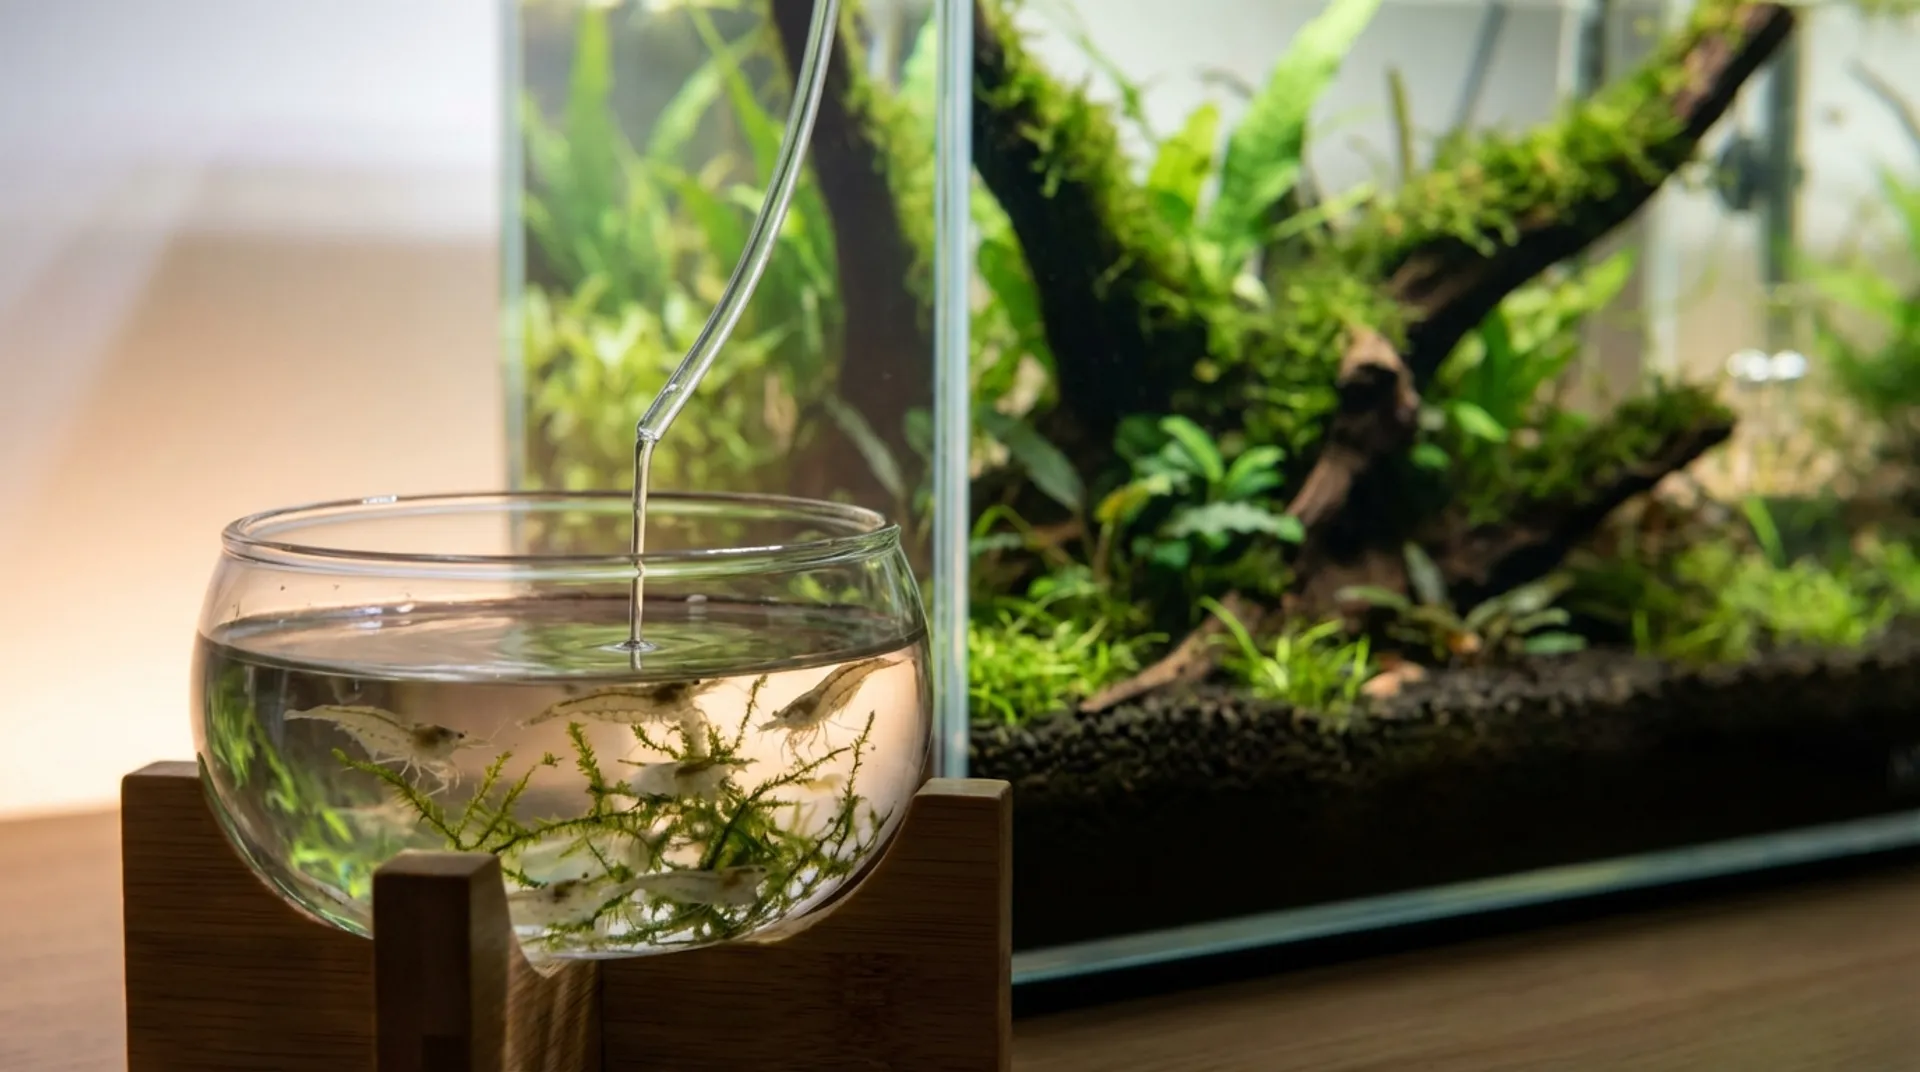
Step-by-Step Drip Acclimation Process
What You’ll Need:
- Clean bowl or container (at least 32 oz capacity)
- 3-4 feet of airline tubing
- Air valve or tie-able knot for flow control
- Small net for transferring shrimp
- Thermometer
- Timer
The Process:
-
Prepare the container: Pour the shrimp and all shipping water into your clean bowl. Keep the container in a quiet, dimly lit area.
-
Temperature equalization: If there’s a large temperature difference (more than 3°F), float the sealed shipping bag in your tank for 15-20 minutes first, or let the bowl gradually reach room temperature.
-
Set up the siphon: Place one end of airline tubing in your tank and the other end in the shrimp bowl. Start a siphon by sucking on the tank end (or using a valve starter).
-
Control the drip rate: Use an air valve or tie a loose knot in the tubing to achieve 1-3 drops per second. Count the drips to ensure consistency.
-
Monitor the process: The acclimation should take 1.5-3 hours total. For sensitive Caridina species, lean toward the longer timeframe.
-
Watch for ammonia buildup: If you notice shrimp gasping at the surface after 2+ hours, the acclimation water may have too much ammonia. Transfer immediately.
-
Transfer carefully: Use a net to move only the shrimp to their destination tank. Never pour the acclimation water into your display tank.
Pro tip: Calculate your drip time by doubling the bowl’s water volume. If you start with 8 oz of shipping water, you’ll have 16 oz when finished, meaning the water is now 50% tank water and 50% shipping water—safe for most transfers.
Drip Method Advantages
- Gradually adjusts all parameters (temperature, pH, TDS, GH, KH)
- Lowest risk of osmotic shock
- Works for all shrimp species and sensitivities
- Allows monitoring of shrimp behavior during the process
- Industry standard recommended by professional breeders
Drip Method Disadvantages
- Time-intensive (1.5-3 hours)
- Requires more equipment and setup
- Risk of ammonia buildup during long sessions
- Not suitable for emergency situations
Float Method: Quick but Risky
The float method primarily equalizes temperature and allows minimal chemical mixing. While much faster, it’s only appropriate in specific circumstances.
When to Use the Float Method
- Only when shipping and tank water parameters are very similar (within 0.2 pH, 50 TDS, similar GH/KH)
- For robust Neocaridina varieties when parameters are close
- Emergency situations where immediate transfer is necessary
- When you’re confident about water compatibility
Step-by-Step Float Process
-
Float for temperature: Keep shrimp in sealed shipping bag and float in tank for 15-30 minutes until temperatures match.
-
Open and test: Carefully open the bag and test both waters for pH, TDS, and temperature to confirm similarity.
-
Gradual mixing: If parameters are close, gradually add small amounts of tank water to the bag every 10-15 minutes.
-
Quick transfer: After 30-45 minutes total, net the shrimp and transfer to tank.
Float Method Advantages
- Much faster (30-45 minutes total)
- Simpler process requiring minimal equipment
- Effective temperature equalization
- Good for emergency transfers
Float Method Disadvantages
- High risk if parameters differ significantly
- Doesn’t gradually adjust chemical parameters
- Not suitable for sensitive Caridina species
- Limited mixing of water chemistries
- Higher mortality risk
Comparison Table: Drip vs Float Method
| Factor | Drip Method | Float Method |
|---|---|---|
| Time Required | 1.5-3 hours | 30-45 minutes |
| Parameter Adjustment | All parameters gradually | Temperature only |
| Risk Level | Very Low | Moderate to High |
| Best For | All shrimp, especially Caridina | Close parameters only |
| Equipment Needed | Airline tubing, valve, container | Just the shipping container |
| Success Rate | 95%+ when done properly | 70-80% depending on parameters |
| Beginner Friendly | Yes (with patience) | No (requires experience) |
Species-Specific Considerations
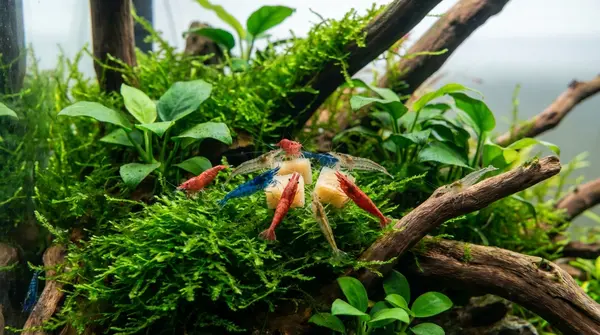
Neocaridina Shrimp (Cherry, Blue, Yellow, etc.)
- Tolerance: More forgiving of parameter differences
- Target ranges: pH 6.5-8.0, TDS 100-300+ ppm, GH 4-8
- Acclimation time: 1.5-2 hours usually sufficient
- Method: Drip recommended, float acceptable if parameters are close
Caridina Shrimp (Crystal Red, Bee, Taiwan Bee, etc.)
- Tolerance: Extremely sensitive to parameter changes
- Target ranges: pH 5.5-6.8, TDS 90-200 ppm, GH 0-4, KH 0-2
- Acclimation time: 2-3 hours minimum
- Method: Always use drip method, never float method
Common Acclimation Mistakes to Avoid
-
Rushing the process: Taking shortcuts leads to dead shrimp. Plan for the full acclimation time.
-
Pouring shipping water into tank: This can introduce diseases, parasites, or harmful chemicals.
-
Ignoring ammonia buildup: Long acclimation times in small containers can create toxic ammonia levels.
-
Skipping parameter testing: Always test your tank water and shipping water if possible.
-
Not quarantining: New shrimp should be quarantined for 2 weeks before joining established colonies.
-
Acclimating directly to main tank: Use a separate quarantine tank for the healthiest introduction.
Pro tip: Keep a dedicated acclimation kit ready with airline tubing, air valve, thermometer, and clean containers. Having everything prepared reduces stress when new shrimp arrive.
Post-Acclimation Care
Once your shrimp are successfully acclimated and transferred:
- Monitor closely for the first 24-48 hours for signs of stress
- Don’t feed immediately—wait 24 hours to let them settle
- Maintain stable parameters for at least a week
- Watch for molting issues in the following weeks
- Keep lights dim for the first few days to reduce stress
Conclusion
While both acclimation methods have their place, the drip method remains the gold standard for shrimp keepers who want to maximize survival rates. The extra time investment pays off in healthier, longer-lived shrimp that adapt better to their new environment.
For beginners, always choose the drip method regardless of the species—it’s simply the safer choice. As you gain experience and learn to accurately test and compare water parameters, you might occasionally use the float method for robust Neocaridina when conditions are nearly identical.
Remember, proper acclimation is just the first step in successful shrimp keeping. Quarantine new arrivals, maintain stable water parameters, and monitor your colony closely during those critical first weeks. Your patience during acclimation will be rewarded with a thriving, healthy shrimp colony that brings years of enjoyment.
Frequently Asked Questions
Use the drip method for all shrimp, especially Caridina species. The float method should only be used when your tank water and shipping water have nearly identical parameters and you only need temperature equalization.
Drip acclimation typically takes 1.5-3 hours for most shrimp species. Caridina shrimp often benefit from the longer end of this range due to their sensitivity to parameter changes.
Aim for 1-3 drops per second during drip acclimation. This slow rate allows shrimp to gradually adjust to differences in pH, TDS, GH, and KH without shock.
Never pour shipping water into your display tank. Use a net to transfer only the shrimp to avoid introducing pathogens, different water chemistry, or potential pollutants.
Shrimp deaths after acclimation are usually caused by osmotic shock from rapid parameter changes, ammonia buildup during long acclimation periods, or introducing them to incompatible water conditions.
Yes, quarantine new shrimp for 2 weeks in a separate tank to monitor for diseases and ensure they're eating properly before adding them to your main display tank.
Track Your Parameters Like a Pro
Stop guessing if your water is right. ShrimpKeeper tracks TDS, GH, KH, pH, and temperature with species-specific recommendations.
Download FreeRelated Articles

Complete Beginner's Guide to Cherry Shrimp Care
Discover why cherry shrimp are the perfect starter species for beginners. This comprehensive guide covers everything from tank setup to breeding, making shrimp keeping simple and successful.

How to Acclimate Shrimp: The Complete Drip Method Guide
Master the art of shrimp acclimation with our comprehensive drip method guide. Learn how to safely introduce new shrimp to your tank and avoid common mistakes that lead to losses.
How to Make Your Own Shrimp Food at Home: Complete DIY Guide
Discover how to create cost-effective, nutritious homemade shrimp food that promotes better growth and breeding. Get proven recipes and step-by-step instructions.